RLG2182
Aquarium Advice FINatic
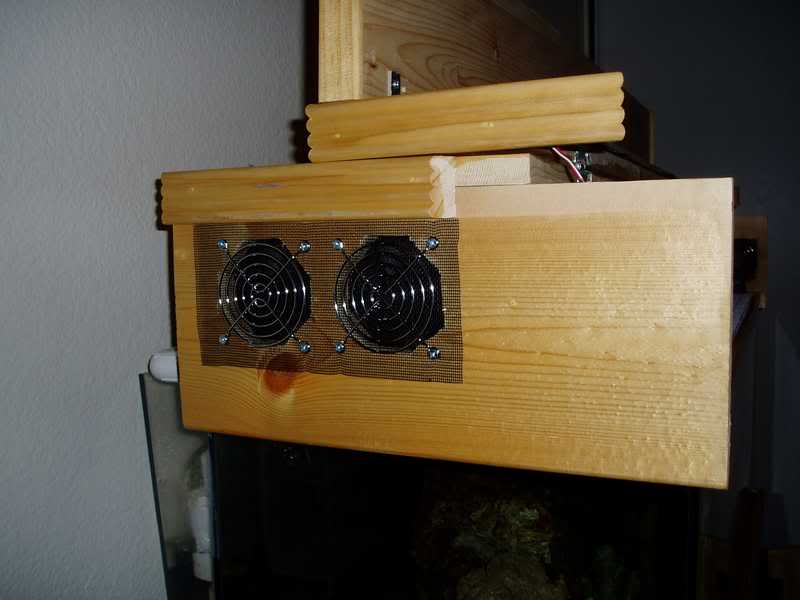
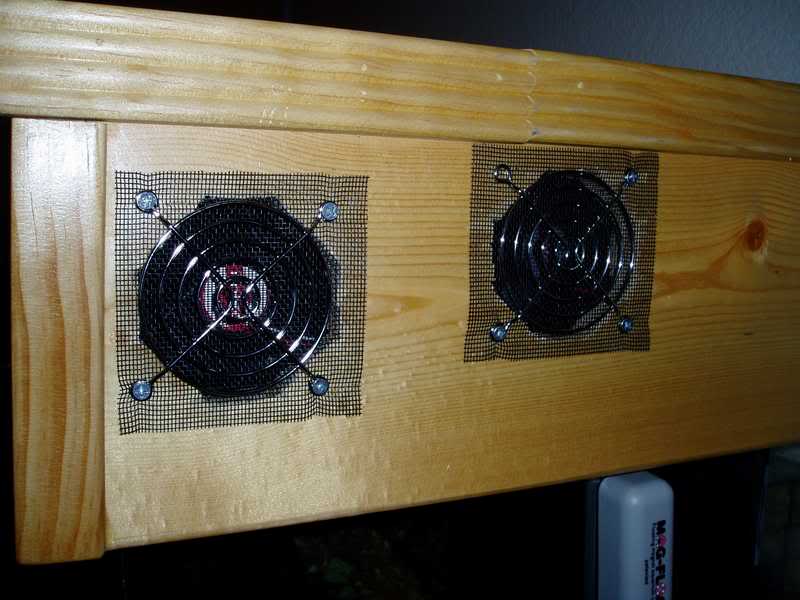
Hey guys!  This time I didn't do a full write up merely because of the thousands of canopy types and configurations. However, hopefully these few pics will show how mine are situated and the end result on how they look.
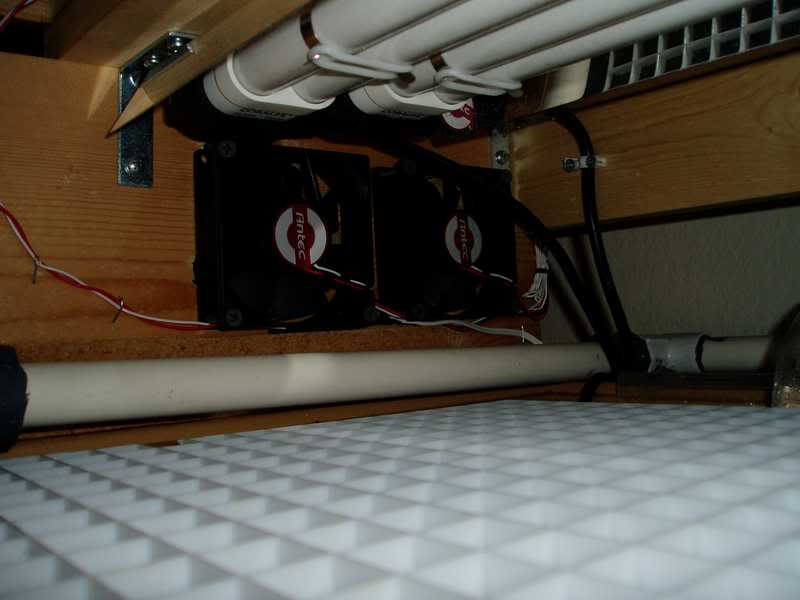
I used (4) 80mm fans purchased from www.compusa.com for $2.80 each. The power supply I had from an old router that no longer works. The screen is just regular fiberglass window screen, and the fan guards go for about $.99 each. Whole project took a saturday morning, and cost about $20 total. I used a drill, jigsaw, and electrical equipment (soldering iron, solder, wire, heat shrink). Each fan is 0.14A, and my power supply is 1A. This means that I'm only using half (0.56A) of the 12V AC/DC adaptor's power... which is what you want. Don't trust an adaptor to push 100% of the mA it's rated for. (1000mA = 1A).
Just wire all of the (+) wires to the (+) and the (-) to the (-) and you're done! The red is usually the positve, and black negative. On most power supplies, the wire that has ridges is usually positive, although some may be different. Just make sure that if you staple the wires to the wood with a staple gun, don't let the staples go so deep that they break the sheathing of the wires. Since PC fan wires are so thin, this is very easy to do. What will happen is that the staple will bridge both the positive and negative wire together, creating a short. So if you do decide to staple them into the canopy, do so lightly.
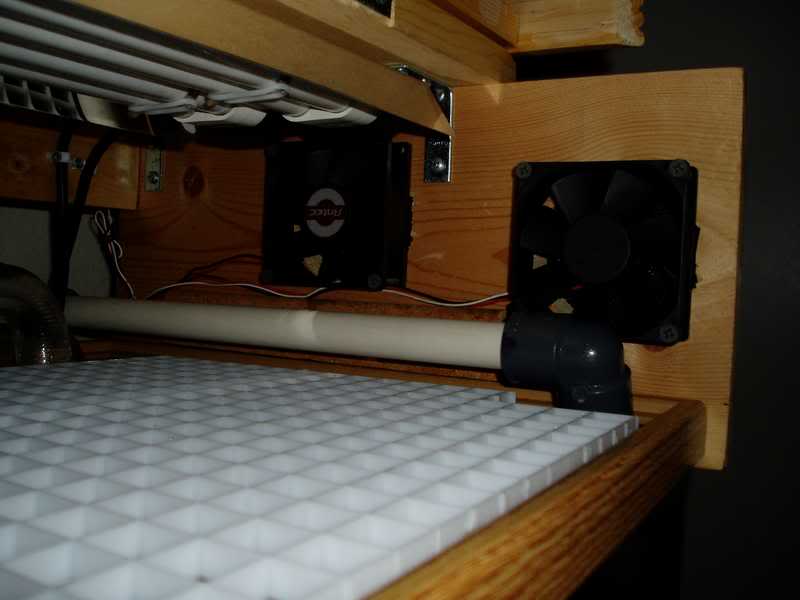
Lastly, test the fans out before you screw them in to see which direction they flow. Have one side blow in, the other side blow out. If you take a look at this pic:
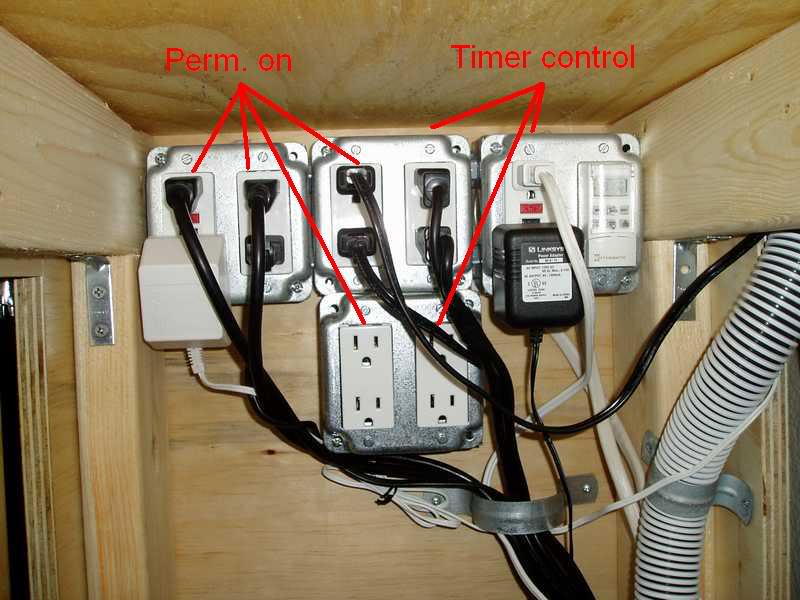
This is how my final wiring config. is setup as. There are 4 outlets plugged together that are perm on. The other 3 are controlled by the digital wall timer. My canopy fans are programmed to come on along with the PC lights, and so is the 10" fan that blows across my sump. The DIY moonlights stay on 24/7, along with my two PHs and pumps. I'll be happy to answer any questions you may have to wiring this all up, or installing into your specific canopy.
This time I didn't do a full write up merely because of the thousands of canopy types and configurations. However, hopefully these few pics will show how mine are situated and the end result on how they look.
I used (4) 80mm fans purchased from www.compusa.com for $2.80 each. The power supply I had from an old router that no longer works. The screen is just regular fiberglass window screen, and the fan guards go for about $.99 each. Whole project took a saturday morning, and cost about $20 total. I used a drill, jigsaw, and electrical equipment (soldering iron, solder, wire, heat shrink). Each fan is 0.14A, and my power supply is 1A. This means that I'm only using half (0.56A) of the 12V AC/DC adaptor's power... which is what you want. Don't trust an adaptor to push 100% of the mA it's rated for. (1000mA = 1A).
Just wire all of the (+) wires to the (+) and the (-) to the (-) and you're done! The red is usually the positve, and black negative. On most power supplies, the wire that has ridges is usually positive, although some may be different. Just make sure that if you staple the wires to the wood with a staple gun, don't let the staples go so deep that they break the sheathing of the wires. Since PC fan wires are so thin, this is very easy to do. What will happen is that the staple will bridge both the positive and negative wire together, creating a short. So if you do decide to staple them into the canopy, do so lightly.
Lastly, test the fans out before you screw them in to see which direction they flow. Have one side blow in, the other side blow out. If you take a look at this pic:
This is how my final wiring config. is setup as. There are 4 outlets plugged together that are perm on. The other 3 are controlled by the digital wall timer. My canopy fans are programmed to come on along with the PC lights, and so is the 10" fan that blows across my sump. The DIY moonlights stay on 24/7, along with my two PHs and pumps. I'll be happy to answer any questions you may have to wiring this all up, or installing into your specific canopy.