WBAC88
Aquarium Advice Activist
So, I decided that I needed a project today and since I'm thinking about slowly adding some riparium elements to my 65g planted tank, I thought that I would make a DIY mount for my light so that I could raise and lower it depending on how high out of the tank the plants would eventually grow. After some time spent googling, I hadn't come up with a whole lot (maybe I just missed it), so I measured the dimensions of the tank, the light and everything else and made my way to good ole Home Depot. After wandering around with no particular plan, I called my dad and we talked it over and eventually, we decided on a course of action.
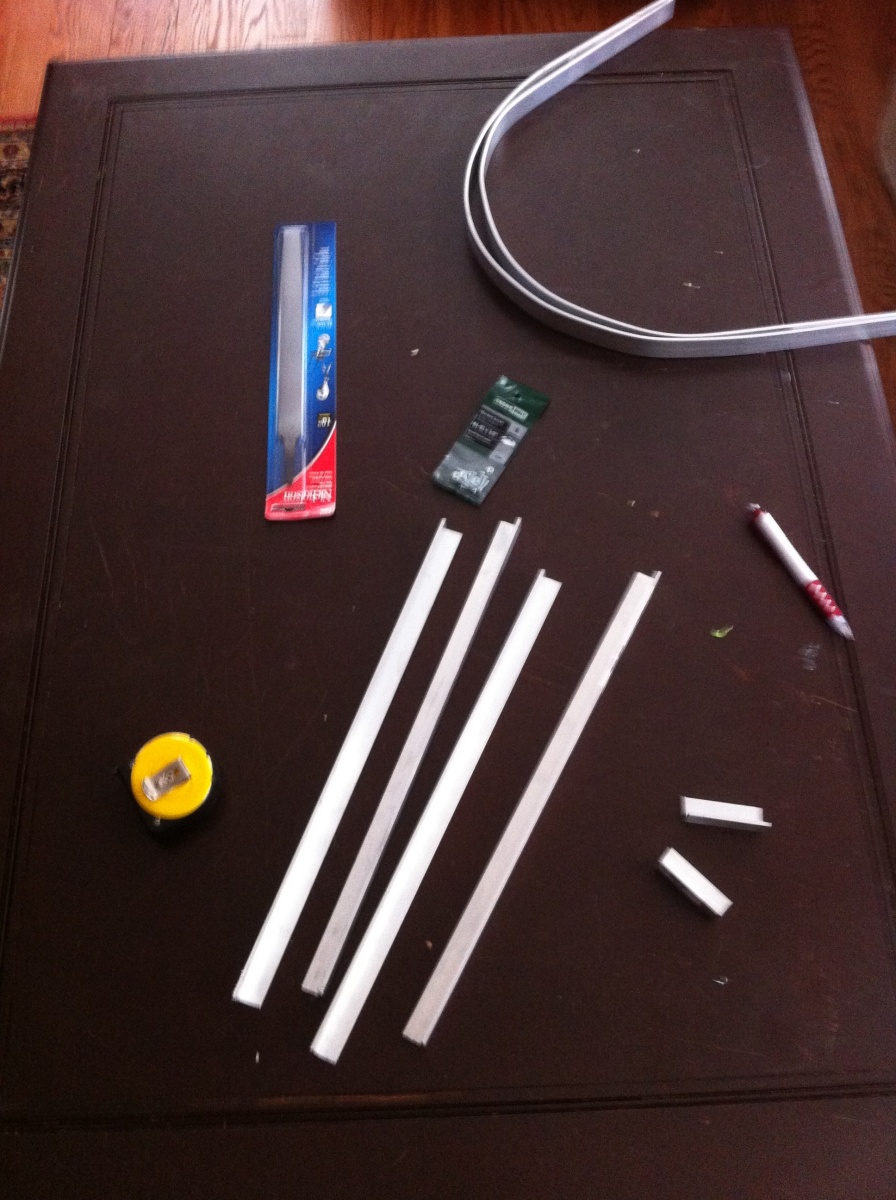
I bought 2 1"x36" aluminum strips and 2 3/4"x36" aluminum "L" strips, two 8" lengths of chain, 2 hook screws, 4 4-40 1/2" round head bolts with nuts a metal file, and a hacksaw.
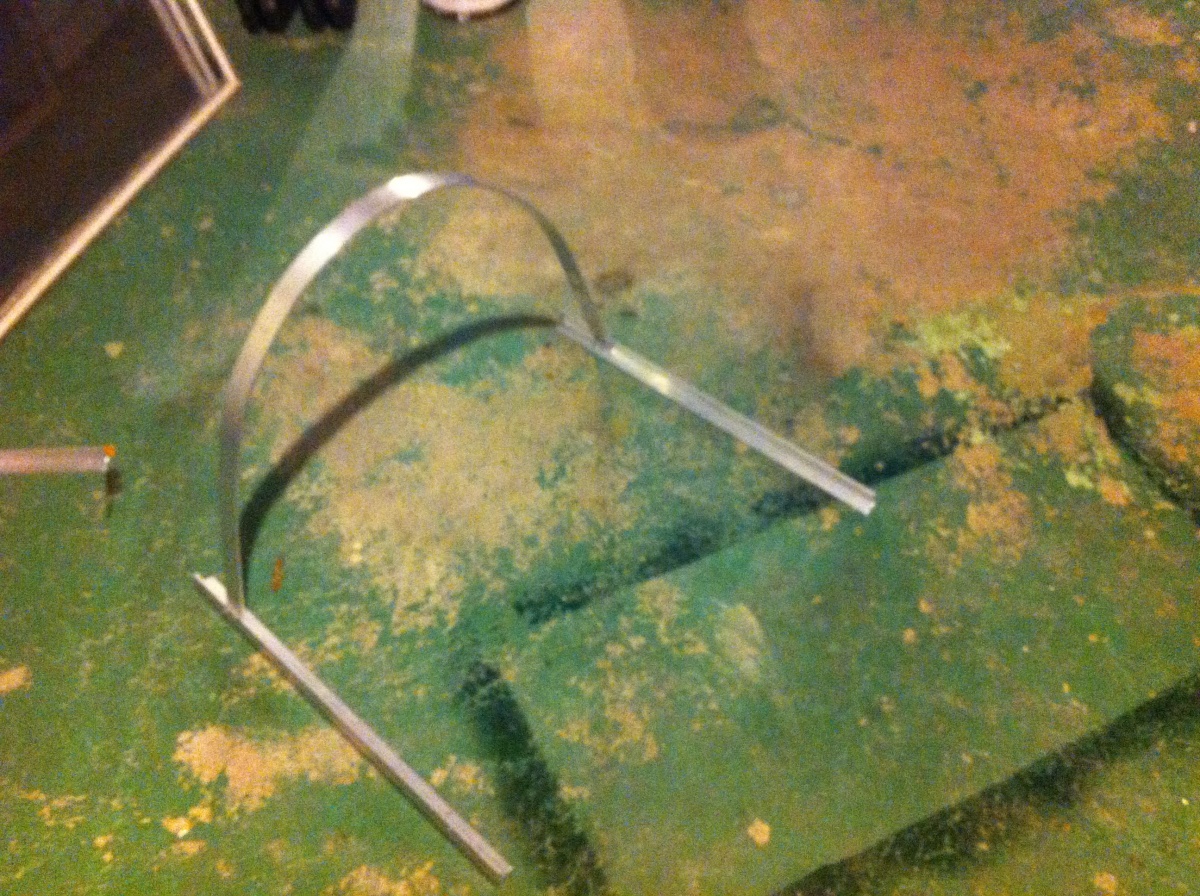
My tank is 36" long, but divided in half by a plastic strip, so I measured the length of each half and cut the "L" strips to fit. Then, I bent the flat strips by hand into the arch shapes you see above. Then, to attach them all together, I drilled 2 holes about 2 1/2" in on one side of each "L" strip and 2 holes at the base of each end of the flat strips. Using the nuts and bolts, I screwed them together forming something like this:
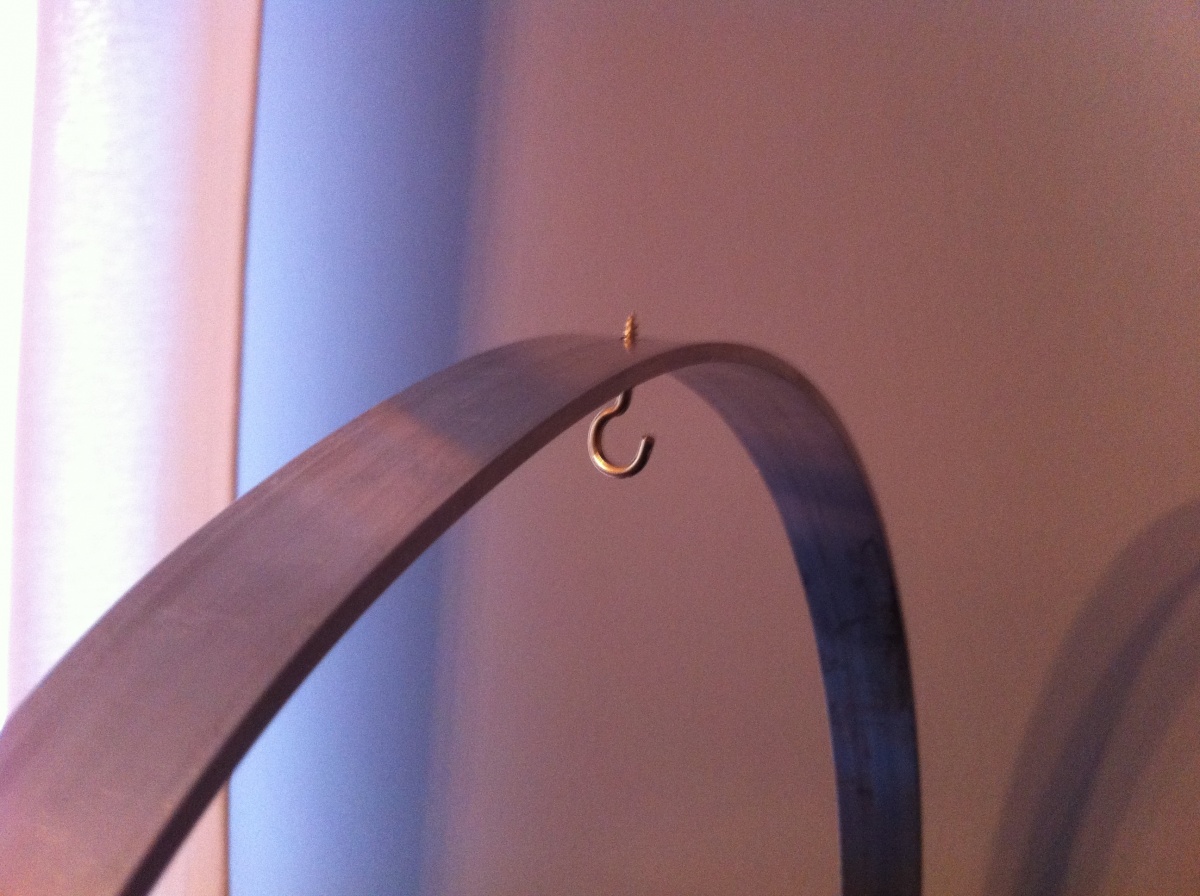
It looks rather flimsy, and it is light, because of the aluminum, but once the bolts were tightened in, it actually is quite solid. Then, having assembled both of these, I had to go about hanging my light from the pieces. I drilled a hole in the top of each arch and screwed in one of the hook screws:
Then, after much deliberation and anxiety, I decided to carefully do the same to the casing of the light itself. I gently drilled a hole and screwed the one hook onto each end of the light casing, again, about 2 1/2" from each end. Then, it was just a matter of deciding how high above the water I wanted it and adjusting the links in the chain to match. The result:
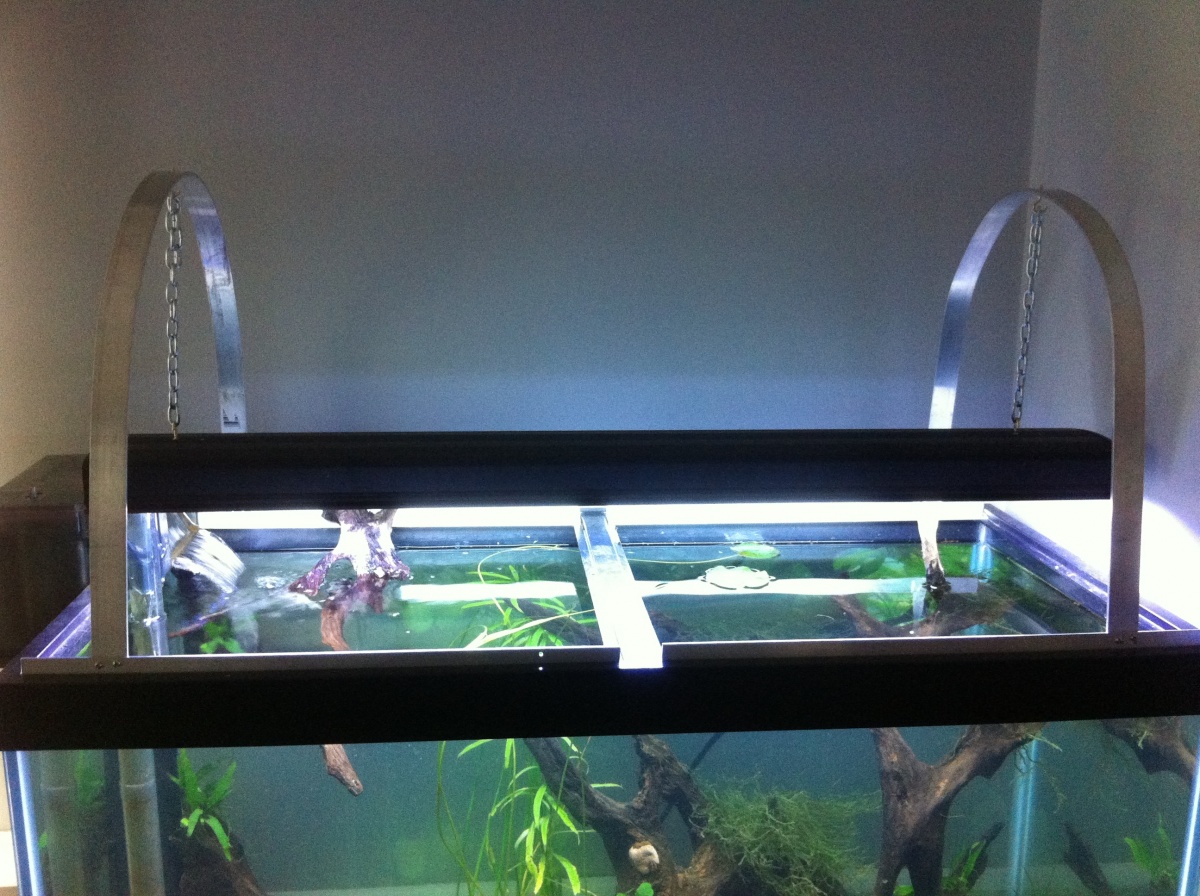
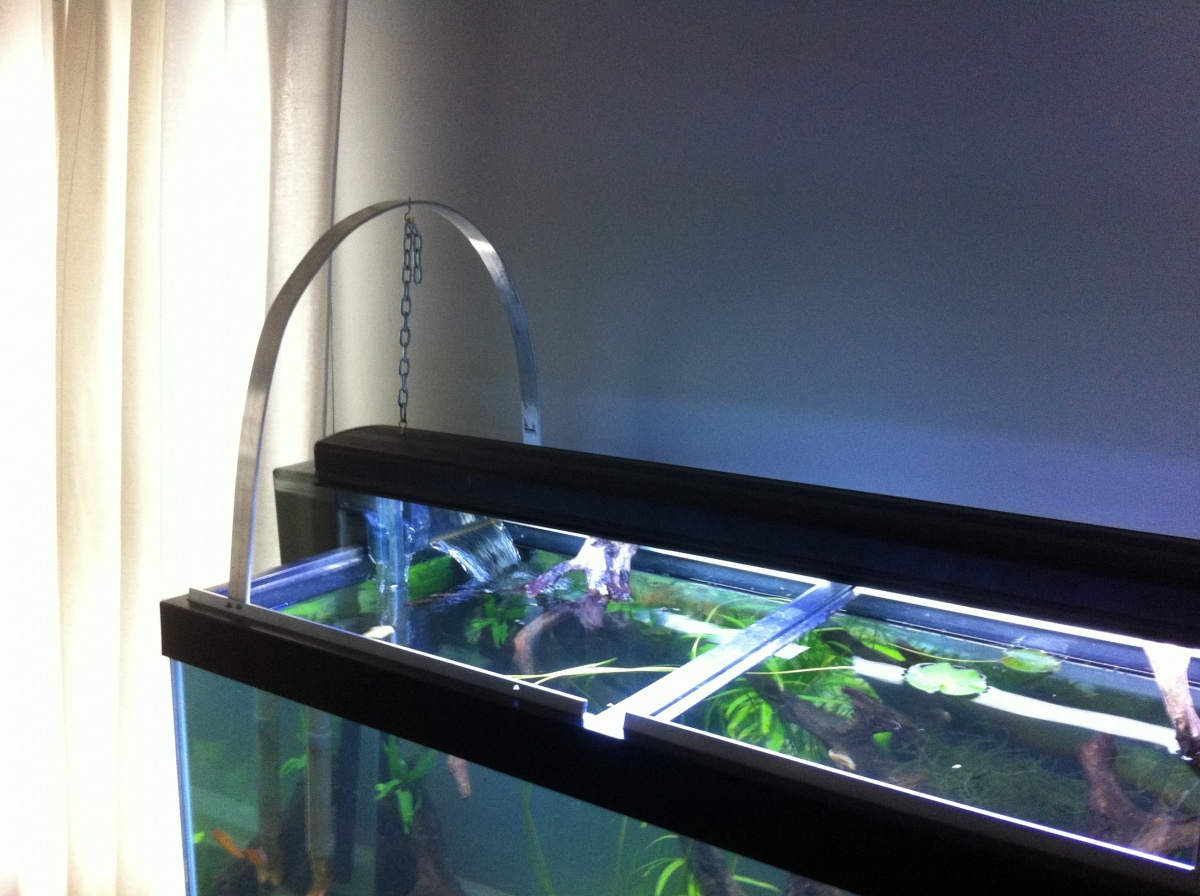
I'm not the handiest guy in the world and I can't tell you how gratifying it was to finish this and see that (for the time being at least) it worked! It's not the most attractive thing in the world, but it works and it does have a certain industrial aesthetic to it that I don't mind. I think all told, it came to about $30 and an afternoon's work, so not too bad.
I bought 2 1"x36" aluminum strips and 2 3/4"x36" aluminum "L" strips, two 8" lengths of chain, 2 hook screws, 4 4-40 1/2" round head bolts with nuts a metal file, and a hacksaw.
My tank is 36" long, but divided in half by a plastic strip, so I measured the length of each half and cut the "L" strips to fit. Then, I bent the flat strips by hand into the arch shapes you see above. Then, to attach them all together, I drilled 2 holes about 2 1/2" in on one side of each "L" strip and 2 holes at the base of each end of the flat strips. Using the nuts and bolts, I screwed them together forming something like this:
It looks rather flimsy, and it is light, because of the aluminum, but once the bolts were tightened in, it actually is quite solid. Then, having assembled both of these, I had to go about hanging my light from the pieces. I drilled a hole in the top of each arch and screwed in one of the hook screws:
Then, after much deliberation and anxiety, I decided to carefully do the same to the casing of the light itself. I gently drilled a hole and screwed the one hook onto each end of the light casing, again, about 2 1/2" from each end. Then, it was just a matter of deciding how high above the water I wanted it and adjusting the links in the chain to match. The result:
I'm not the handiest guy in the world and I can't tell you how gratifying it was to finish this and see that (for the time being at least) it worked! It's not the most attractive thing in the world, but it works and it does have a certain industrial aesthetic to it that I don't mind. I think all told, it came to about $30 and an afternoon's work, so not too bad.
")