Heavy duty tank cabinet build.

The friendliest place on the web for anyone with an interest in aquariums or fish keeping!
If you have answers, please help by responding to the unanswered posts.

zparticle

Aquarium Advice Addict
Joined
Jun 22, 2011
Messages
1,235
Location
Westminster, CO, USA
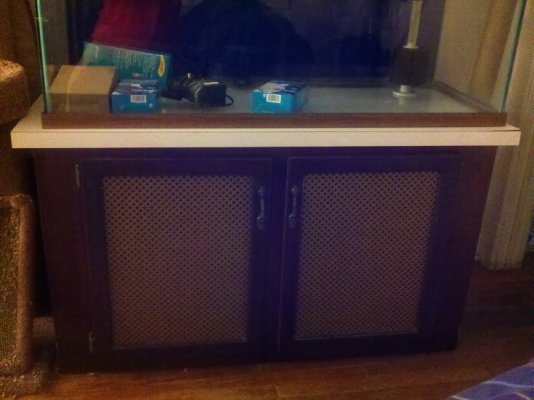
I decided to build my own tank cabinet to place my tanks on. Started it today. It was really hot here today so I think I'll stop where I'm at and work on it another day.

The cabinet will have front doors, inside storage shelves, internally mounted power strips and areas for various power supplies, pumps, cables, etc. I'm going to finish it with stained birch. Should end up looking very nice. The dimensions are 8' long x 32" high x 22.5" deep.

For today I got the basic frame in place. I will keep adding pics to my FB album and you can look at them here.

-Scott
 
That is a very solid looking stand. Do you think it could maybe do with a pair of uprights in the middle to help spread the weight, right around where the crossbeam is?

That should happily hold another 55g alongside it too ;-)
 
Yeah I'm going to be adding center supports but it was VERY hot here today and I had had enough. :lol:

I bought a really nice big sheet of birch to use for the outside and top.
 
My dad built a stand for my 75. The only difference I see from what you are doing and he did is that he added uprights in the center, at the crossbeam as fouldsy indicated, of each long rail and then did a diagonal cross brace in each "square." Two end "squares" and two "squares" along the back...each have an "X" in the middle.

I would have no question about taking a 90 gallon (largest the stand will hold based on width) and filling it with nothing but rock and water. My floors would never hold the weight but the stand will with no problems :)
 
Sorry...it was a birthday present so it was complete when I got it. I sold the tank, it just had too big a footprint for the house, but kept the stand and it is being used for storage at the moment...CDs and computer supplies. The top is actually a piece of formica countertop.

I do have a pic of the outside of it..tank is still there..the pic was before the tank sold. I'll empty it a bit and try and get some other pics up tomorrow of the inside. There is a floor in the cabinet so I can't show the bottom frame.
 

Attachments

  • Stand.jpg
    Stand.jpg
    154.3 KB · Views: 319
Oh, I hear ya. Living in here in St Louis, it gets stupid humid, and just too hot to build anything of note in the summertime. I was glad I got to build my aquarium stand in March, as last summer I built a computer desk and it was unbearable, let alone then trying to stain the **** thing :-( Looking forward to seeing how this works out for you - looks great so far!
 
I do have a pic of the outside of it..tank is still there..the pic was before the tank sold. I'll empty it a bit and try and get some other pics up tomorrow of the inside. There is a floor in the cabinet so I can't show the bottom frame.

I really like the doors your dad put on it. I haven't decided exactly how I'm going to do my doors yet.

I ended up doing some more work on it, it cooled off a bit. I got a horrible sunburn on my neck today putting the frame together. :nono: I've added the middle supports, this thing is going to be able to hold a military tank, fish tanks won't be a problem. :lol:

I just finished applying the first coat of stain to the birch and the quarter round trim pieces which are pine. I probably should have waited until everything was together to stain it but I can touch it up later. I'm thinking I need to apply a top coat to toughen it up a bit given that both birch and pine are soft woods.

I've posted more pics to the photo album.
 
Looks good with the stain on the top! Yeah, I often use a primer first with pine to help the stain apply evenly as it can end up uneven with the wood being fairly soft. I've also taken to finishing with a polyurethane coat or two to help protect it a little more and really help smooth out the appearance.
 
Thanks for the complement and thanks for tips on the polyurethane coat.

As a side note, I've constructed the entire thing using screws, not nails, I want to be able to disassemble it when/if I move.
 
Since I don't really care what the inside looks like, I want to keep the weight down, make this easy to disassemble, plus I don't want to spend the money on the materials, I'm going simple. I had leftover adjustable shelving materials from another project, just going to use them.

I fixed a couple of little areas on the birch board with some wood filler. Have to sand those down and re-stain tomorrow.

Okay I think I'm actually done for today, no really, I am. :D

Pictures of the shelf hangers are up in the album.
 
If you need any help let me know I am an experienced cabinet maker I have built pre- fab cabinets and from scratch with canopys softwood and hard plywood and mdf I mix my own stains and have built stands to hold everything from 5-400 gallon tanks I will be happy to help along the way
 
:)....my dad wrinkles his brow at building things with nails...he always uses screws and enough of them that anything that is attached to something else wouldn't be moved even if hit by a tornado.

Uhm, have to say he has rubbed off on me...I use screws as well, but then, it is much easier to work with screws with the new fangled drills that do the work for you :)

The doors are actually inserts. He attached the metal piece to plywood and then inserted them into the door frame...the inserts are removable.
 
i built a stand for my tanks also here's mine
5691852398_79d02276aa.jpg
 
If you need any help let me know I am an experienced cabinet maker I have built pre- fab cabinets and from scratch with canopys softwood and hard plywood and mdf I mix my own stains and have built stands to hold everything from 5-400 gallon tanks I will be happy to help along the way

I'll take you up on that offer. While lying in bed last night I realized I have a few issues. I thought I was being clever by making the thing 8' long I could avoid a bunch of cutting. However as I was visualizing what it would look like using the 1/4 rounds to join the top and sides at the corners I ran into some issues.

First, I have no idea how to make the cuts for a three way join of the 1/4 rounds and even if I did I'm guessing I would need a mitter saw which I don't have.

Second, I decided that would look awful because the cabinet would basically end up just being a big square box. So I decided that isn't the way I want to go. I think I want to make the top overhang the edges by about 1 1/2" on each side. I also decided that if I ever wanted to put the thing in the center of a room (like a kitchen island) I was going to have to enclose and finish the back side. This means I need the top to overhang on the back as well. Because the length of the cabinet is currently 8' and the birch board is also eight feet I have no room for an overhang. This means I need to disassemble the ends of the frame and cut off a few inches from the struts on each end. A pain but I see no way around it.

Third, now that I'm going with an overhang the 1/4 rounds are useless except for the vertical corner joints where the front/back meet the ends. So I need to do something about decorating the edges of the top piece. I'm thinking about finding some decorative molding to glue and nail on the edges of the top. Give it a little more pizazz. This also means I need stain the under side of the top piece which I hadn't planned on doing. I guess I should do this anyway as is will make the interior look better, although not a lot due to the frame being visible inside.

Fourth, While thinking about how the side pieces are going to be attached and joined at the corners I realized I'm going to have an issue. Because the screws used with the corner brackets don't sit flush the side panels won't either. Now I figure I can either make little holes in the back of the side pieces that the screws will sink into or I can tack on some thin spacer strips to the frame to push the sides out away from the screws. I'm not sure what the right thing to do is.

Finally I'm really unsure how to go about cutting out the areas for the doors without making a total mess. I have a jig saw and and circular saw but I'm not clear on how to go about this. I need to save the cutout portion to use for the doors, or maybe I should build the doors out of a lighter material, that 3/4 plywood is very heavy.

Any help/advise you can give me is welcome.

-Scott
 
Good gravy, never do calculations when you are tired. I disassembled the ends and shortened each on by 3/4". What's wrong with that? I didn't account for how thick the sides would be. :facepalm: Well, I'm not tearing it apart again if I can avoid it. So...

The new plan is to use the entire 8' foot length of the plywood for the top, since the frame is now 94 1/2" long if I used 3/4" plywood for the ends I would have no overhang on the ends which would look stupid. :blink: So I'm going to switch over to 1/4" wood for all of the sides that way I can at least get 1/2" overhang on the ends. This will make things lighter as well.

I'm still going to cut the top so that I have a 3/4" overhang on both the front and the back. The frame is currently 22 1/4" deep so adding another 1/2" to account for the front and back panels I get 22 3/4", Now add another 1 1/2" for the front and back overhangs we have 24 1/4" deep for the top.

Top: 96" x 24 1/4" (this does not include the decorative molding that adds another 1/4" per side)
Top Thickness: 3/4"
Side Thickness: 1/4"
Frame Length: 94 1/2"
Cabinet Length (not top but including end pieces): 95"
Overhang on ends: 1/2"
Frame Depth: 22 1/4"
Cabinet Depth (not top but including side pieces): 22.75"
Overhang on front/back: 3/4"

I won't be using any of the 3/4" plywood for the sides now so I can use some of it for the inside of the cabinet. Probably to put in a "floor", or maybe the shelves. (y)

The 1/4 rounds I bought and stained are now useless because they are 3/4" in size and won't fit the new 1/4" sides. Bummer. :banghead:
 
Ok well you prolly won't use your cut outs for door cause they will be small cause you will loose a 1/4 for your blade width I see no other option other then shorten the stand unless you want to but 12' lengths of 1/4 round but you might have to change the design of the top to square stock boards of your choice
 
Okay well there isn't much new to show but I put up picks with the first coat of polyurenthane, the frame after shortening it a bit and the new pieces of molding I'm going to be putting around the edges of the top of the cabinet.

So at this point I'll have 1/2" overhang on the ends and 3/4" overhang on the front and back. Not great but at least it won't just be a big box.

I have to go get the 1/4" plywood I'm going to use for the sides. Not sure if I'll bother doing that until I get the top all finished. Once that is finished I can also use the remaining wood for the shelves inside. That will look better than the crappy white boards I was gong to use.

Any suggestions for this issue?

"While thinking about how the side pieces are going to be attached and joined at the corners I realized I'm going to have an issue. Because the screws used with the corner brackets don't sit flush the side panels won't either. Now I figure I can either make little holes in the back of the side pieces that the screws will sink into or I can tack on some thin spacer strips to the frame to push the sides out away from the screws. I'm not sure what the right thing to do is."
 
Back
Top Bottom