Paludarium Build

The friendliest place on the web for anyone with an interest in aquariums or fish keeping!
If you have answers, please help by responding to the unanswered posts.
Just caught up on the last page of 20 posts...so much going on here. I appreciate the details and thought processes. As mentioned previously, this is going to be epic.
I don’t have much to add to this. Perhaps the use of reticulated foam near the water level that would provide moisture to the roots of creeping plants like dwarf baby tears, Glosso, creeping Jenny, and various terrestrial and semi-terrestrial Mosses.
 
Perhaps the use of reticulated foam near the water level that would provide moisture to the roots of creeping plants like dwarf baby tears, Glosso, creeping Jenny, and various terrestrial and semi-terrestrial Mosses.
Very interesting ... I like the idea of plant roots being part of the waters edge.
I know little of plants actually ?
I plan on having my bolbitus and buce in the tank and after that ?
I have some crypts and lots of mosses . My willow hygro grows right out of my grow out tanks .
I have dwarf hair grass that I have never trimmed and probably has a hundred runners ? The two masses are like 8"X8"X8" of tumble weeds ?
Will that grow out of the water if kept immersed?
Better yet what plants will grow immersed and do well above the water.. I got a lot room above the water and want some form of plant to be both aquatic rooted and growing yet do well above the water and possibly grow to some height?
 
Off the top of my head, pothos and other creeping plants do well with wet roots. There are many aquatic plants that grow nicely in this type of setup. You just need patience and humidity during the transition. I am not sure about hairgrass though.
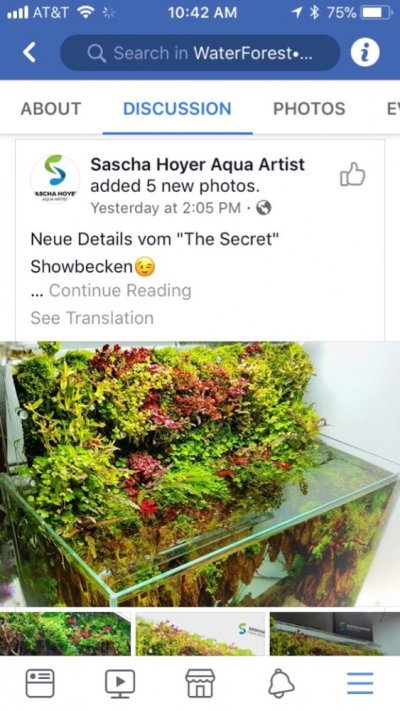
I was on YouTube looking up Hamburg Matten filters and found one where plants were growing on a mat of sphagnum moss placed over the HMF foam. I dont have a pic of it but found a similar setup on a FB post. Not my pic but left the posters name for credit. IMG_5731.jpg
 
Fluval 3.0 has arrived ..I was going to be pissed that to run the 24/7 feature you had to use the Fluvalsmart app from your phone ,but with the video they had I am pretty pleased with this light and how it works .Even for an old un -tech savvy guy it was pretty straight forward and easy ..8 minute video with phone in hand and light turned on and you are done.;)
I think I set like ...EVERYTHING how I wanted for the 24/7 ! It lets you preview your settings in the 24/7 sped up to like a minute ,with an actual graph of different light settings so you can see where in the day you are on the app ...(y)

Sump is assembled ! I am not a neat freak so didn't tape the seams ..As I have mentioned before I would never do my own reseal even though I install caulk professionally. Once cured this will hold up to what it has to.
YPWOggml.jpg

69drubZl.jpg

uOSEGGRl.jpg

RkHinrZl.jpg

Mx910Bgl.jpg

I added one short baffle to hold sponge in place and force water up through it some .
New bulkheads and co2 diffuser should arrive in time for week end.
Need to start working in the tank now I guess..
 
Will be interested to see the light in action.

Nice built sump design.
Thanks on the sump . I thought Jimbo nailed the design for a planted tank where you want less gas exchange .Less baffles equal less gas exchange. Overflow in tank and overflow in sump along with return ought to be fine IMO.
Preview of how my light is set.It ramps up quick in the preview mode but I have it set to take from 7-9:30 to for sunrise and 7-9:30 for sunset.
I read lots of complaints on how it shuts off completely at night ,but I think I got mine to be on all night how ever I set it ...
Had a rain day [ I LOVE THEM! ] so I got a little caught in fish room and worked on cutting slates for this .
The long slate on aquarium bottom will be mounted to back at waterline like the one over the overflow. The slate coming out on left will be where land begins and anole does not drowned !(y)
I made a little slate peninsula for land and light . I already know it is going to be hard to get light into the water as the 3.0 is about 50+ inches above the surface so I am thinking I could hide a 24" 3.0 under the slate and it would only be about 8" above the water and could be run on same schedule exactly to add light to the half that will; be the deepest water where most plants will be.
Tell me what you think of the slate ..I am not committed completely yet but have no other ideas..
SsS1SQvl.jpg

Iq1pz22l.jpg

PvdXTjdl.jpg

gxlYHw1l.jpg

RkNFGRel.jpg


I plan to cut a slate to cover the top of overflow also so creatures can't escape to sump and continue the land from corner to corner.
 
Been slow moving forward physically but have been gathering more supplies .
I got a 24 inch 3.0 to go under the slate land feature and bring light right down to a better level for water inhabitants. I will program its time in sync with upper 48 inch but set levels at what I like best for proximity to water and plants..This is a nice light .Only issue is even on 1% blue at night it is too bright to be on all night IMO so I will look for a cheap LED moon beam I can dim to almost nothing.
Traded in rams and got 3 bags of eco complete for the tank..
Ordered 5 lbs of Spanish Moss and got my order today..In a simple cardboard box with holes punched in it the weight is 10.2lbs...I got a S .L. of moss ! The box is 12x12x24 and packed !
So being an air plant that thrives on the humidity in the air and I guess is good for 'cleaning' the air I am thinking of draping any extra from my wood racks in the fish room. It will be an interesting add to the pothos in making the fish room look a little more ???? Mossy? I got a lot of moss !
Need to fill and test for leaks in the overflow and get moving here .:whistle:
Not sure if I mentioned but I plan on incorporating some kind of plenum under the sub and in the "slate land mass" with my otherwise useless [IMO] bio balls... A blast from the past...But I guess they are the in thing for plenums now ....
 
Wow, we'll need to check back with you about your moss dealer! Did they have other types of moss or forest / woodsy plants? That is a pretty sweet deal for 5 lbs.
 
checked my order and did only order 5lbs ...
$19.97 plus shipping brought total to $34..
Test driving tank for leaks and it looks good..
IF5t2iOl.jpg

The box of moss ,cork ,moss rods and moss vines and overflow/return pipes trimmed to size .
dJYko3Hl.jpg

7iwsZWdl.jpg

9MiS7ahl.jpg

Test driving with craft fabric for pleneum floating in tank..Looking good on overflow seal ..(y) You can see the reflection from the 24 inch light under the slate .I am liking this solution to land creating shadows and the distance from the 48 inch light for still being able to see into water section..:dance:
8cZIzLtl.jpg

FdDXXUgl.jpg


1S6MoP4l.jpg

First toss of moss without much branches yet ?
 
This is a cool build. Moss looks okay on its own. More branches, though, at different heights would fill in the space.
 
Climbed under tank to hook up bulk heads and pump [ready to go] and see the tank itself is leaking in the back right corner ...:facepalm:
The tank is 13 years old but I see damage to the caulk so I don't think it is product failure ?
Draining tank and debating 're caulking' inside completely after scraping / pulling caulk or just trying to apply enough to get a good bond to glass in the one end ? None of this needs to be neat it just needs to work and last...:nono:
I was minutes from plugging it in....:banghead:
 
Bummer man.. just silicone a rock into the corner? Quick fix... or cut it out and do it proper:/
 
Made thread in saltwater section wondering who chewed my silicone..
http://www.aquariumadvice.com/forums/f11/what-could-have-done-this-365444.html
My thoughts are my conchs .I know that on almost all my silicone air lines in fresh water grow bio slime quickly. I know many say snails love bio slime ??
Well I didn't want to pull all the caulk as the damge seemed limited ..
I taped 2 verticals and the bottom front and back right side and installed caulk to seal glass to glass incase its adhesion to itself fails.Silicone is notorious for not sticking to itself..I wiped the whole show several times with alcohol after scraping glass and wiped one more time minutes before caulk install...Now to wait a little and back to it..
Before ;
BICIfE9l.jpg

9XO4G7pl.jpg

a8qKCgal.jpg

After with tape still in place;
ZpxVEDnl.jpg

2aIrasll.jpg

pnObsGwl.jpg

pbSFR2ll.jpg

It sure would have been easier if it wasn't 3/4 set up but it is done and hopefully works ....
 
Caulk looks like crap and within minutes of filling there appears to still be a leak .:nono:
I know I didn't re seal properly but since the tank was still structurally good I attempted an admitted cheat..NO BUENO ....
I am on to plan two now which ironically will not be re sealing this tank I think.
A new aqueon 75g is only $99 at my LFS [if they still have the one left] and I own drill bits...:whistle:
If the bottom is not tempered I think I will go that route...LFS is closed on Mondays so I will find out tomorrow.
If possible then I will only need to drill 2 holes and install my overflow to new tank...
I never really thought the tank would leak or it would take this long..I was so close I can't help but want to rush a little now ?
 
Back
Top Bottom