Biocube 29 with inTank and Steve's LED Mod Review

The friendliest place on the web for anyone with an interest in aquariums or fish keeping!
If you have answers, please help by responding to the unanswered posts.

Starchar

Aquarium Advice Freak
Joined
Feb 20, 2011
Messages
384
Location
Indianapolis, IN
So I have my BC up and running after my move and am starting fresh. The tank is currently cycling but I wanted to walk through the new upgrades that I have added.

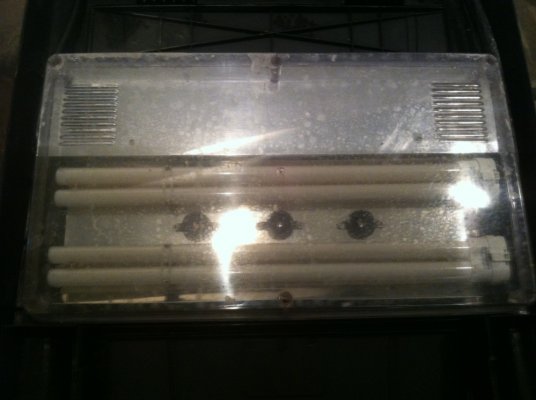
First, I added the inTank Media Basket and Fuge. I am running Filter Floss in the top, Purigen in the middle, and Chemi Pure Elite in the bottom. In the Fuge I have Chaeto that is being lit by the JBJ Nano Fuge LED Light. I like the light as it has a nice magnet that sits inside the tank and allows me to move it around as needed. I will soon be running it on an alternate timer to help control pH swings.

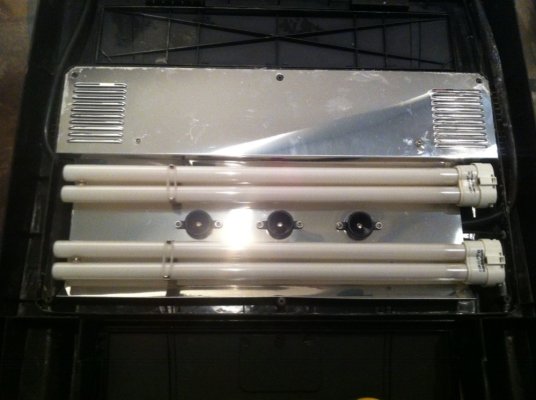
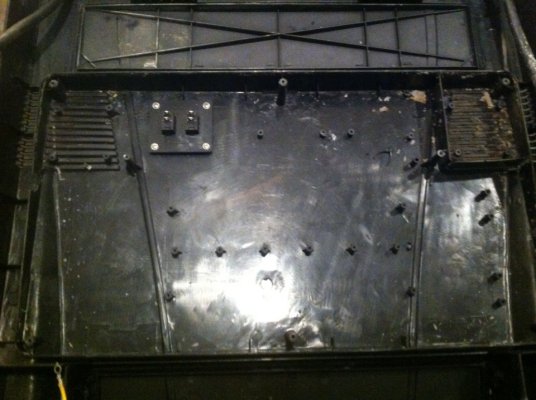
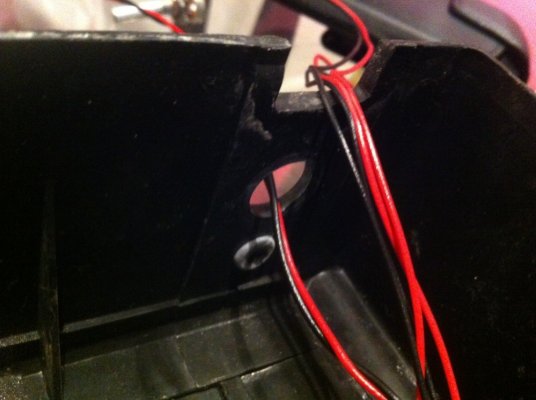
The inTank filtration is neat but of course the pise de resistance has got to be my new LED mod for the hood! I have been asked to take some pics of installation so I will do my best to walk through this. Also, I decided to go with Steve's LEDs instead of the RapidLED retro kit so that I could offer up some additional information on kit options to the members here. I will break this up by posts so that I can talk about each step.

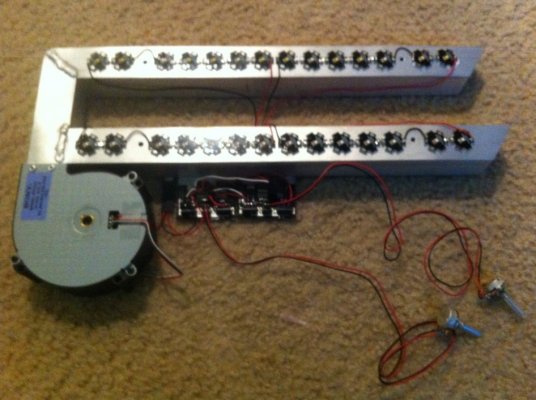
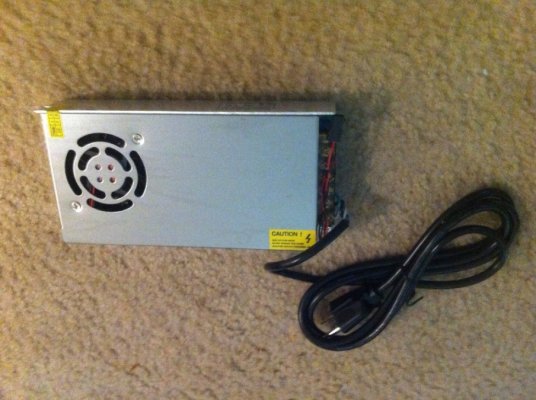
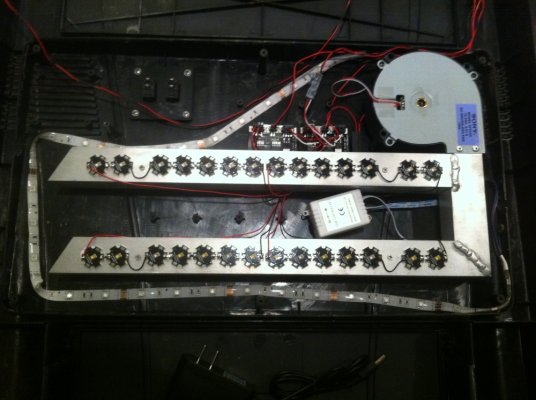
Here is the kit. I paid and extra $35.00 and had the techs at Steve's LEDs put it together for me. I delayed shipping by a day or two but was well worth my time. Total cost of kit was $249.99 plus the $35.00 for assembly.

Specs:
18- Royal Blue Luxeon ES 3 watt LEDs
10- 5,000K Neutral White Luxeon ES 3 watt LEDs


They estimate total installation time to be 1 hour. I think that I was done in under 30 minutes!


Attachments

  • IMG_1405.jpg
    IMG_1405.jpg
    252 KB · Views: 321
  • IMG_1406.jpg
    IMG_1406.jpg
    254.9 KB · Views: 201
  • IMG_1407.jpg
    IMG_1407.jpg
    257.3 KB · Views: 176
The next step was the removal of the splash guard from the hood, removal of the wiring cover, followed by the removal of all the components inside of the hood. Afterwards, you will realize how badly it needs to be cleaned.

A phillip's head screwdriver and pair of wire cutters was all I really needed.
 

Attachments

  • IMG_1408.jpg
    IMG_1408.jpg
    198.9 KB · Views: 232
  • IMG_1409.jpg
    IMG_1409.jpg
    224.9 KB · Views: 247
  • IMG_1410.jpg
    IMG_1410.jpg
    248.1 KB · Views: 291
  • IMG_1412.jpg
    IMG_1412.jpg
    250.4 KB · Views: 192
The only moderately difficult part was the removal of the plastic barrier surrounding the old fan and one raised screw post. The instructions say to use a dremmel or something. I found that the wire cutters and some back an forth movement worked just fine.

Basically when the kit goes in you don't want any pieces that stick up above the posts that you will use to mount to the hood.
 

Attachments

  • IMG_1415.jpg
    IMG_1415.jpg
    239.1 KB · Views: 290
  • IMG_1416.jpg
    IMG_1416.jpg
    242 KB · Views: 170
I ran the wiring out of the one of the existing holes in the back of the unit that previous wiring went through.

The top notch I used to run the dimmer knob wiring out of the back.

Note: I ended up removing the switches from the power and left the rubber on the not running these wires out of this notch. It worked really well and seems to hold the knobs securely.
 

Attachments

  • IMG_1417.jpg
    IMG_1417.jpg
    213.7 KB · Views: 180
Finally I mounted the kit inside the hood. It attached with 4 screws that come with the mod and lined up perfectly inside the hood. It was very secure.

Note:

I also purchased a remote flexible LED night light that you can see lined up around the kit. The white transformer in the middle of the retro kit belongs to the night light kit. I am still working on getting it up and running.
 

Attachments

  • IMG_1419.jpg
    IMG_1419.jpg
    244.9 KB · Views: 263
Finally I put the original splash guard back on and plugged it all into the power supply and wah lah!

Before and after photos of the tank with the new LED upgrade!
 

Attachments

  • IMG_1402.jpg
    IMG_1402.jpg
    222.3 KB · Views: 249
  • IMG_1420.jpg
    IMG_1420.jpg
    210.2 KB · Views: 275
Thanks for that Starcher .... I've been trying to decide on the led upgrade I will do. I have stock now but have been looking for weeks to decide which one I want. I've looked at the current system to the radion system. All if which are different prices. But Steve's LED is among the front runners. I also like the current system but still not sure. Did u shop around much before deciding on Steve's ?
 
I did a ton of looking around before deciding on Steve's. I know that plenty of people are happy with the RapidLED setup. I don't think that there is a a heck of a lot of difference. With both kits you can have the LED color modified to your liking. I ended up picking up Steve's because they had good reviews and it gave me the opportunity to offer up a review on the lighting kit here.

The installation was much easier than I thought it would be. I am really glad though that I had it assembled and didn't have to worry about soldering. I am not sure if Rapid offered that option honestly.
 
I hear ya.... I'm not afraid of soldering but not experienced enough tI feel good about my abilities when they charge little to do it. Why not .... One less thing to worry about. Thanks for the info ... I'll post my journey with that as well.
 
Looks good! Awesome job. I too have the BC29 with all the inTank goodies. I also upgraded the lights. I went with the AI SOL BLUE LED fixture and mounted it into the hood in such a way as to keep the stock splash guard.

Anyway... Tank looks awesome! Keep posting those pics! Wanna see it grow.
 
Convict - I am looking at purchasing a auquaillumination in about a week. What is your take on the fixture so far? And is it a reef set up in your 29?
 
200 gallon reef said:
Convict - I am looking at purchasing a auquaillumination in about a week. What is your take on the fixture so far? And is it a reef set up in your 29?

Yes it is a reef setup had the fixture on my tank for months and everything is doing great.

Whites 40% blues 60% royals 80%


image-3448225688.jpg


image-3468804420.jpg


image-1823012930.jpg


image-3599643948.jpg


image-863540591.jpg
 
I was thinking about doing the same. I am going to but the single one for the 54 gallon first, then as long as it does what it should I am going to buy 3 more for my 200 gallon.
 
200 gallon reef said:
I was thinking about doing the same. I am going to but the single one for the 54 gallon first, then as long as it does what it should I am going to buy 3 more for my 200 gallon.

IMO you'll be very happy with them.
 
Back
Top Bottom