Tank build - newbie again... need thoughts

The friendliest place on the web for anyone with an interest in aquariums or fish keeping!
If you have answers, please help by responding to the unanswered posts.
For a couple days? :confused: With no leaks? How did you manage that? I did test the system out (dry fitted) in my garage but I bypassed the overflow.. didn't notice the sound then. How do you "smack them together" then go back and glue everything? In my set up, It had to be glued before being filled with water, there is no getting behind the tank once filled with water...

Haha yea. I ran my frag system for years actually without going back and gluing the fittings. PVC has always fit really tight for me, I have been running my 12 with them pushed together for a week or so now without any problems. I just smack everything together with a hammer or against the ground :rolleyes:

I usually test run it with hose water somewhere I can mess with it all, then drain it and move it to where I want it and fill it for real.
 
Don't ya love how skimmers don't come with instuctions????? I guess I'll just plug mine in and hope it works like it's suppost to.

Your stand goes so well with your home's woodwork.

I know you're busy now but can you go back to the drawing of your pipes and show what Jimbo is saying? Or what you finally end up doing to solve your noises.
 
I'm sure he can furnish something better then my quick 2 min paint skillz.
but this is what we were saying, there is a 90 that goes from to back of your tank down to the sump, and you put a hole in there to allow air to enter the tube without it sucking it in from the overflow. (noisy) Instead of that 90, install a T and a short piece of tubing up and cap that, then drill through the cap and the inside tube, that way you can twist the cap to control how much of the hole is open. How much air you put in there controls how fast everything drains, and you just fiddle with that till you get it right.

Make sense? I can make some models in solidworks to better illustrate what i'm saying...just feeling lazy this morning.
 

Attachments

  • overflow.jpg
    overflow.jpg
    64.9 KB · Views: 60
cap, yeah... GRRR! How hard is it to put some instructions in the box??? I was able to find some online instructions.... They were almost useless though.... I was confused though, it said "water level should be adjusted so that it is not covering the outlet pipe".... So I assume the pipe should be out of the water? Or do they mean the entire length of pipe? It will add to the noise level by keeping it out of the water and I don't understand the benefit of doing that. Anyway....

Jimbo basically did a great job explaining what we were talking about. Last night I had other things to do so I didn't try drilling any holes... But the drawing on the left with that 90 fitting is the plan... The "T" on the right would be the way I would go now if everything was not glued in.
 
The "T" on the right would be the way I would go now if everything was not glued in.

Oops, sorry again :rolleyes:

Skimmers are pretty easy actually. the main body should be submerged 8-10 inches and there is a large output pipe that stays above that. On mine, you move that pipe up and down to control how it skims. They almost always need a break in period of around 2 weeks or so before they really start doing what they are made to. Just keep adjusting it for a couple weeks and eventually it will lock itself in.
 
Skimmers are pretty easy actually. the main body should be submerged 8-10 inches and there is a large output pipe that stays above that. On mine, you move that pipe up and down to control how it skims. They almost always need a break in period of around 2 weeks or so before they really start doing what they are made to. Just keep adjusting it for a couple weeks and eventually it will lock itself in.

Yeah Ive had skimmers before... And this skimmer performs best between 6-10 inches which is why I attached feet as my skimmer chamber is 11" deep. My outlet pipe extends below that water line so I guess I will have to cut the pipe as there is not enough adjustment to get it above the water line. I wonder why it must be above the water line?

The "break in" period I have read is not really about breaking anything in...makes sense when you think about it... what is there to "break-in"? Its a bunch of acrylic parts...From what I have read the break in period is actually a way for the skimmer to be cleansed and coat it self with a type of slime which makes it more conducive to producing skimmate... The instructions suggest the "break-in" period taking 3-4 weeks. I have read that some guys will give the skimmer a vinegar bath to speed up the break-in period.
 
Yea, but slime-over sounds weird. lol.

Good point! :p

So Jimbo, have you done the mesh mod before? Trying to figure out if I can use my paddle wheel to attach my mesh to... I am guessing that I would just cut off the paddle and drill holes through the wheel to tie the mesh on... most use the pin wheel for the mod but I don't want ruin my pin wheel incase I ever want to go back to it.
 
I've never done it, I would see if you could order an extra impeller for you skimmer and do it. that way you could do some experimenting and compare the two and let us know :p
 
I've never done it, I would see if you could order an extra impeller for you skimmer and do it. that way you could do some experimenting and compare the two and let us know :p

Well I have a pin wheel and the paddle wheel. I found a photo (fuzzy but...) of a paddle wheel being used.. but no instructions etc... I think I will try to do the mod with that wheel so I still have my pin wheel.
 
Great find! I think I can make it happen without making an acrylic disc... Ill just cut off the paddle form the paddle wheel and use whats left to attach my mesh to. But this is very helpful to see how he is attaching the mesh. Thanks!
 
Thanks Jimbo :), so actually the "T" is the extended pipe on my overflow. Groovy, I'm on the right track
 
Update:

Living 2 hours from the nearest LFS stinks sometimes... I should have purchased salt last time I was in Boise but didn't so my tank was sitting full of fresh water... ugh. I decided to drain it all just as a precaution (thought it wouldn't hurt for everything to be soaked and then rinsed... - at least thats what Im telling myself since I already drained out the water... it was about 1/3 RO and 2/3 well water anyway.) Now that its drained I have yanked out the plumbing (Im so glad I put unions in!) and will replace the elbows with "T"s, create a vent and try to cut down on the plumbing noise. I am also making more RO water so it will be 100% RO in the tank.

On the bright side - being forced to wait till this weekend for salt allowed me to shop for live rock, sand, salt etc... (I keep repeating the montra "nothing good ever happens fast in salt water.... nothing good ever......" lol) So I found a guy tearing down his 75 gallon tank who has some nice Live Rock for sale. I am hoping 150 lbs of live rock will cut down on my cycle time and prevent a big ammonia spike... Obviously that will depend on how much if any die off i get on the rock.

I am also taking his sand. He has about 130lbs in his tank and about 20lbs of unused - all of it is fine aragonite sand. My plan is to keep a couple cups of the sand live to help seed and completely rinse the rest in fresh water using a hose. I know I will kill off any good pods etc.. in the sand but don't want to risk adding a bunch of detritus to the tank and cause a big die off... So I will rinse it like crazy before putting it into the tank. I don't think I need 150lbs of sand in the tank (was thinking of about a 2" SB) so I will use some in my fuge too. And maybe some in my live rock chamber too? I will seed both the display tank sand and the refugium sand with some of the live sand. I was thinking of about a 2" sand bed in the refugium also.

Lastly, since I am taking all of his rock & sand he has put the corals and fish he had in another tank and will just use the salt water from that tank so I can transport the rock fully submerged. Would there be any benefit in reusing any of that water in my tank? He also is giving me his macro algae out of his sump - He has some cheato and calurpa. Not sure what type of calurpa it is yet.

So thats it... Thoughts? comments?

also...

Do you all think this will be adequate for the sump?

Pair of 24" T5 lights for the sump.
img_1143897_0_23ac42814bfd47479a0b781bdd5b1f9d.jpg
 
I keep repeating the montra "nothing good ever happens fast in salt water.... nothing good ever......"

I am going through the same thing right now. I am shopping for rock and sand and it is very difficult to wait when you are so close.

I am hoping 150 lbs of live rock will cut down on my cycle time and prevent a big ammonia spike... Obviously that will depend on how much if any die off i get on the rock.

If you transport it wet or even with damp newspaper over it to keep it from drying out much there should be minimal dye off and you should have just about an instant cycle. Just be sure to look over what you are getting very carefully. If there is any hair or bubble algae on it i would take those pieces out and just let them dry to be absolutly sure that the algae is gone. Hair/bubble algae can be an absolute beast to try and remove.

He has about 130lbs in his tank and about 20lbs of unused - all of it is fine aragonite sand. My plan is to keep a couple cups of the sand live to help seed and completely rinse the rest in fresh water using a hose

I would be really careful about reusing sand. If you are dead set on reusing it i would consider getting a drop cloth (just get one of the clear plastic cheap ones from the hardware store) and spreading the sand out over it to dry. This makes sure there is nothing you don't want getting into your new tank. There is no garentee that he hasn't had Ich or something somewhat recently that the cysit settled in the sand bed.

Would there be any benefit in reusing any of that water in my tank?

No, it will be good to transport the rock in but then get rid of it. All that is doing is transfering over all his excess nutrients into your new system which you don't wan't.

Do you all think this will be adequate for the sump?

I have had good sucess just buying a flood light bulb and a cheap socket from the hardware store. I picked up the idea from melevsreef and it has worked great. It is also much cheaper then buying t-5s for the sump.
Melevsreef.com - Refugium Bulb
 
Thanks for the quick response Pat.

I am going through the same thing right now. I am shopping for rock and sand and it is very difficult to wait when you are so close.

Yes.. its hard but then I guess that part of the reason we can really appreciate a beautiful reef tank as we know the amount of time, investment and work that goes into it. And to think I was actually thinking FO when I started this... Its more difficult for my wife - she was wondering if we can pick up an Emperor Angel or Lion while in Boise... lol.. I had to break it to her than not only do we have to wait several more weeks for fish but that neither of those fish will end up in this tank.

If you transport it wet or even with damp newspaper over it to keep it from drying out much there should be minimal dye off and you should have just about an instant cycle. Just be sure to look over what you are getting very carefully. If there is any hair or bubble algae on it i would take those pieces out and just let them dry to be absolutly sure that the algae is gone. Hair/bubble algae can be an absolute beast to try and remove.

This rock (at least the photos ive seen) is really nice stuff. Several soft corals, star polyps etc.. He has told me its absent of any pest algae but will inspect it for sure.

I would be really careful about reusing sand. If you are dead set on reusing it i would consider getting a drop cloth (just get one of the clear plastic cheap ones from the hardware store) and spreading the sand out over it to dry. This makes sure there is nothing you don't want getting into your new tank. There is no garentee that he hasn't had Ich or something somewhat recently that the cysit settled in the sand bed.

Its not so much that Im dead set on it but its half the cost of buying new... I will be sure to clean it well and consider letting it dry out as you suggest.

No, it will be good to transport the rock in but then get rid of it. All that is doing is transfering over all his excess nutrients into your new system which you don't wan't.

Ok - thanks... thats kind of what I figured...

As far as that light goes.. I already have those two T5 lights. I just want to be sure thats enough and I don't need to increase the amount I have in the sump area.
 
While waiting for the new live rock etc.. I took out my plumbing and installed two vents.

img_1144520_0_ea9dfbcde05a475a7761e988ecec890a.jpg


Unfortunately once I set everything back up I realized it won't work... water just shoots out of the vent hole in the side of the cap so I have to just keep it closed. Perhaps if I raise the stand pipe... just not sure to what height. I think if I put an elbow on I can get the vent stacks to go up behind the tank... Not sure - something I will look into in the future.
 
So yesterday I finally was able to pick up the live rock & sand.

We pulled it all out of a nice 75 gallon tank and the rock was then transported completely submerged to my house. I kept a thermometer in with the rock and it never even fluctuated more than 5 degrees the entire time so I am hoping for little or no die off. I didn't weigh the rock but according to the guy I bought it from I have about 150lbs of live and about 40lbs of base rock.

After giving the base rock two really good baths I put it in first... then the sand and finally the live rock.

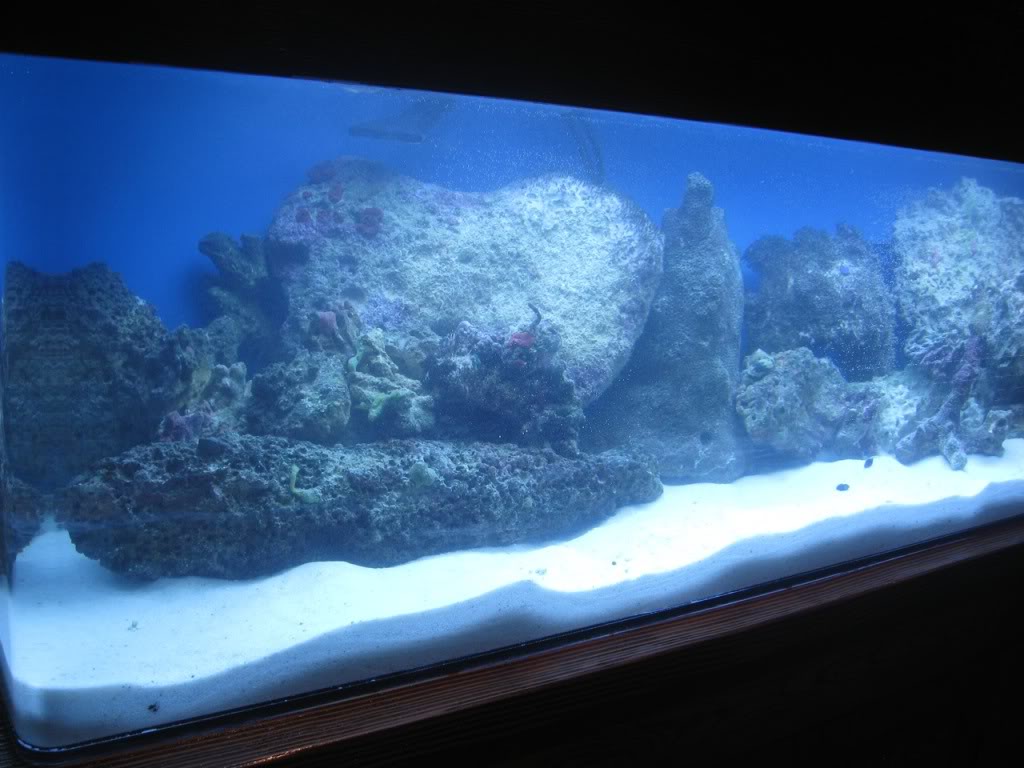
A couple of the pieces of the live rock were really big. I tried my best to set it up so that the rock faced the same way in my tank as in the previous tank but there are a few rocks that have a side or two exposed that probably weren't before. Several pieces of the rock has star polyps and mushrooms on them. There are large quantities of tiny tube worms too. I also noticed about 10 brittle stars, a couple snails, a few hermits and a couple tiny white starfish that snuck in with the rock. Oh, and unfortunately I noticed three small Aiptasia anemones. Once the tank becomes somewhat stable I will be injecting them with lemon juice or be looking for a peppermint shrimp. The rock has no visible nuisance algae which I was happy about.

I also bought two nice pieces of live rock that had some caulerpa growing on it. Both of those pieces went into the sump - I put one in the "live rock chamber" and then one into the refugium. I also put some cheto in the refugium. The guy I got all of this from was taring down his tank so the algae was free - hope it lives.

I am hoping with all this live rock that my cycle is a very small one.... we will see.

As far as the sand goes - I took about 150 pounds of aragonite from him. I kept out about 4 cups worth and then rinsed the rest really well for a long long time. Found lots of bristle worms and copepods in the sand. After completely rinsing it I put it into the tank and refugium. Ended up about 2-3 inches deep. I also added a tiny bit of the live sand as well to hopefully help seed the sand.
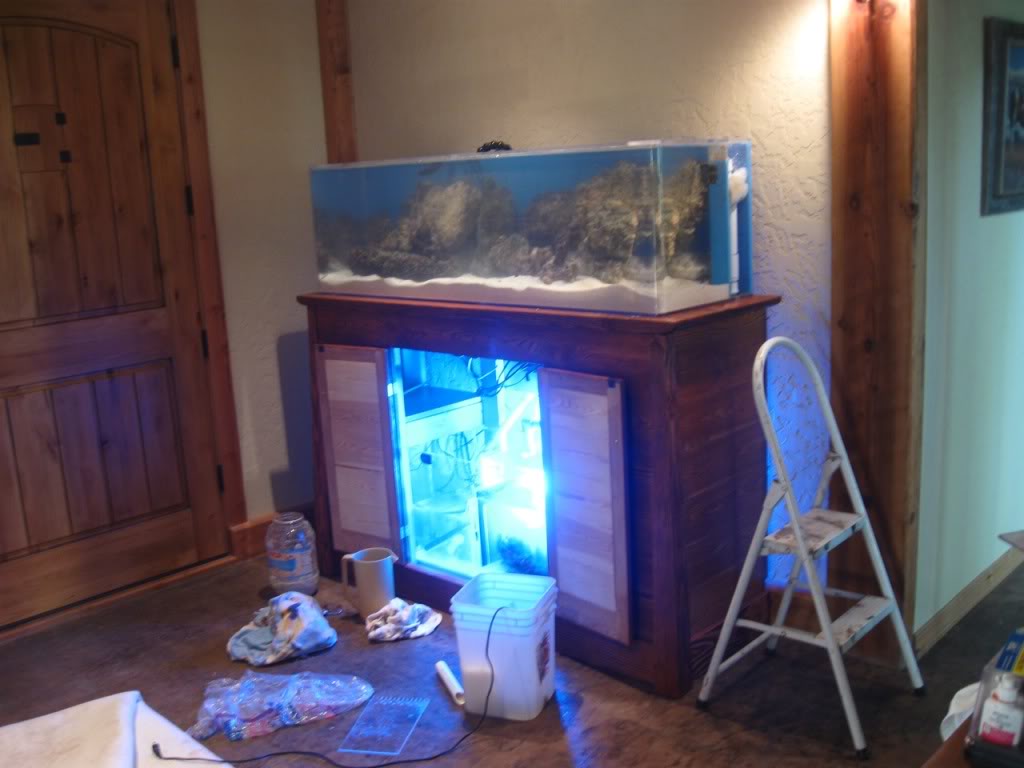
Almost there!
img_1144529_0_ae5793dff4bc6842e6cc5a0b6d142f15.jpg


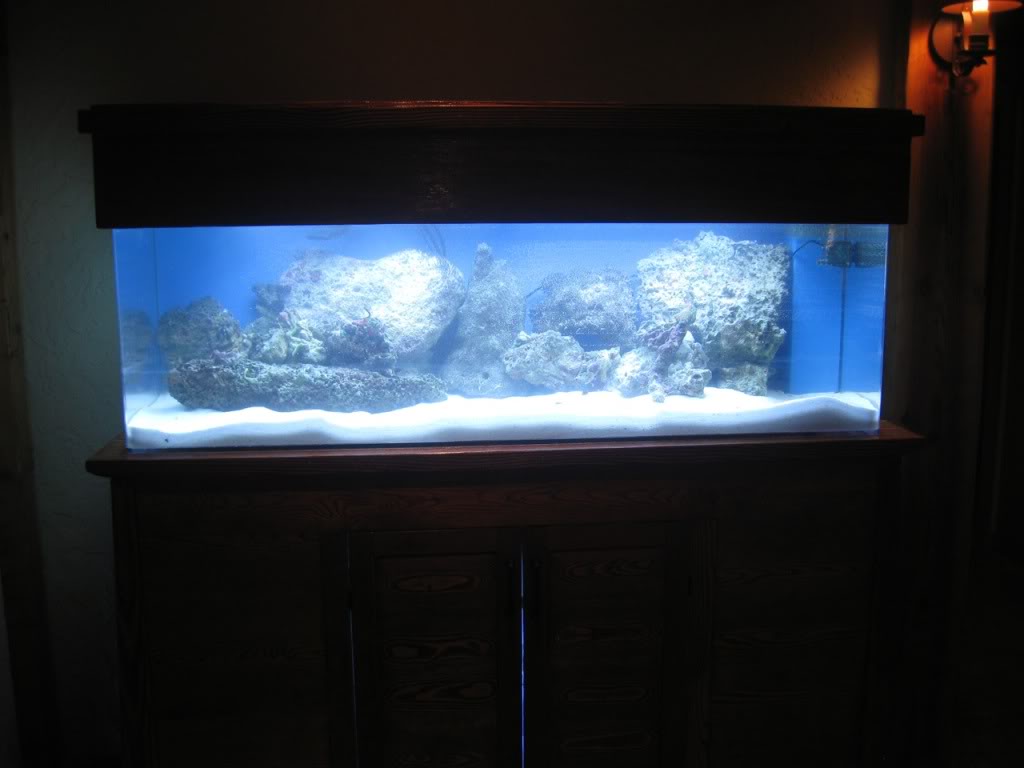
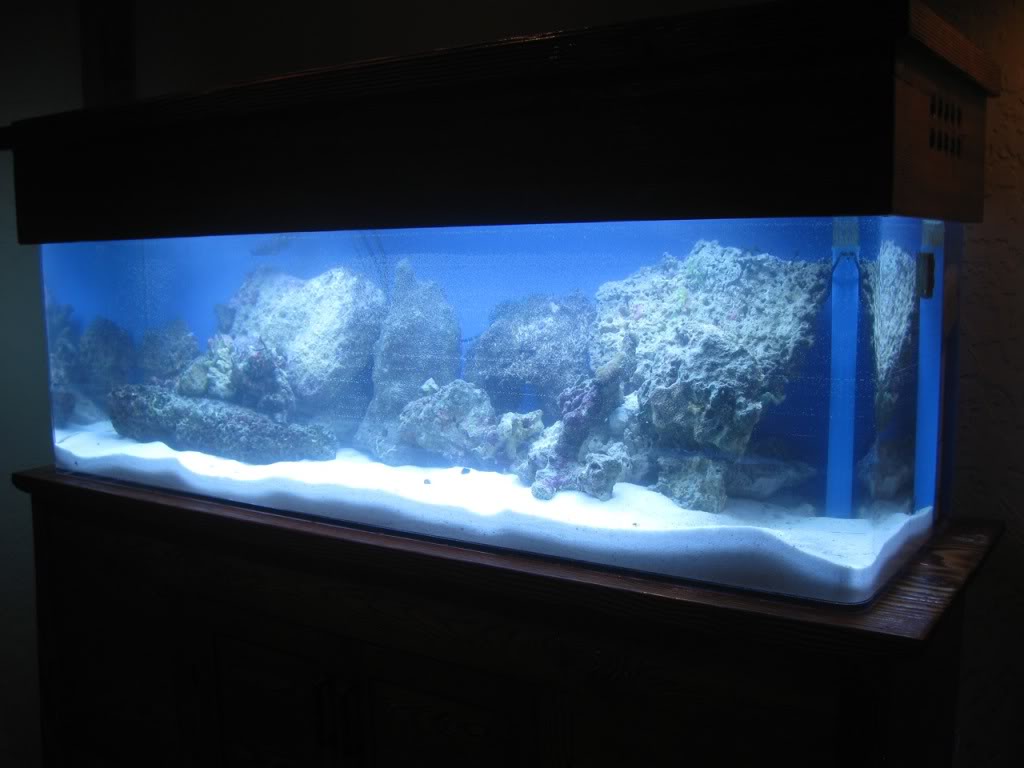
About 2 hours after putting it all in I turned on the lights. I expected things to be cloudy but all things considered the water was really clear and is crystal clear this morning 15 hours later.

img_1144529_1_5cb721b884b41e7ba58297831af63be1.jpg

img_1144529_2_d96bf6504f30aa495a86bbfef8ed1a1a.jpg

img_1144529_3_db019402181a28e7d42918911806eeaf.jpg


I did the best I could with the aquascaping. There are lots of openings for good flow and plenty of shelves etc.. for adding future corals.

5 hours after putting in the rock and sand - my water tests:

SG = about 1.025 (my refractometer has not showed up yet so this measurement is from my hydrometer)
Temp = 78
Ammonia = .5
PH = 8.1
Nitrate = 0
Nitrite = 0

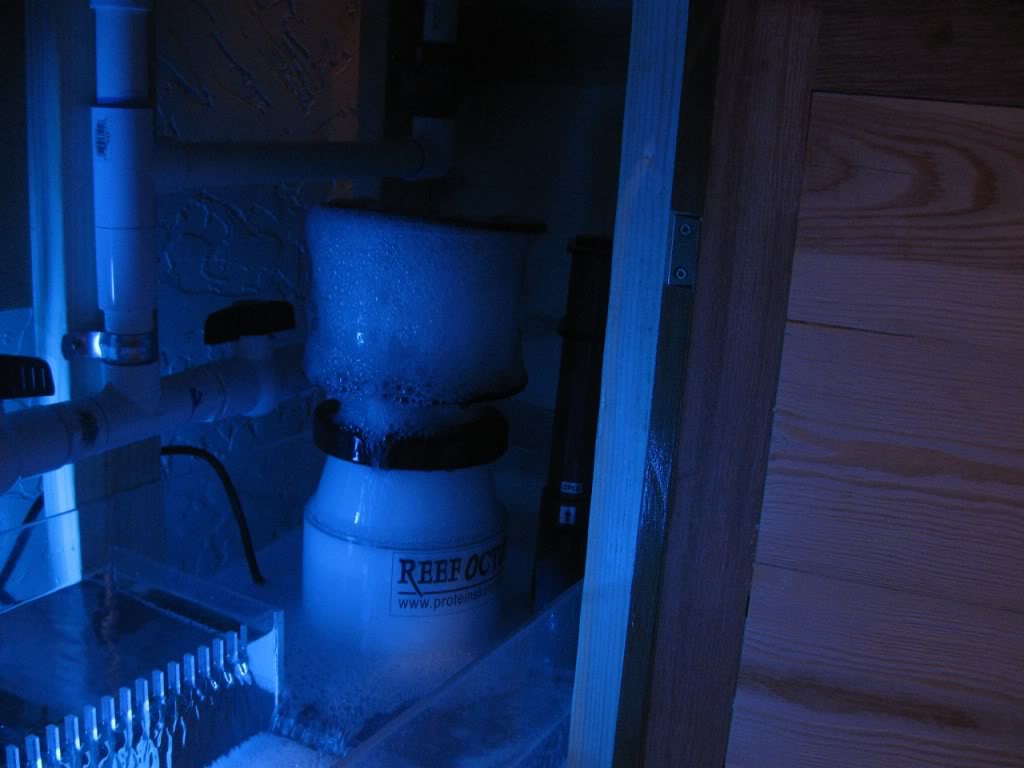
My skimmer is not broken in yet I guess... thing is producing so many micro bubbles that I have opened it up all the way yet still get it foaming over.
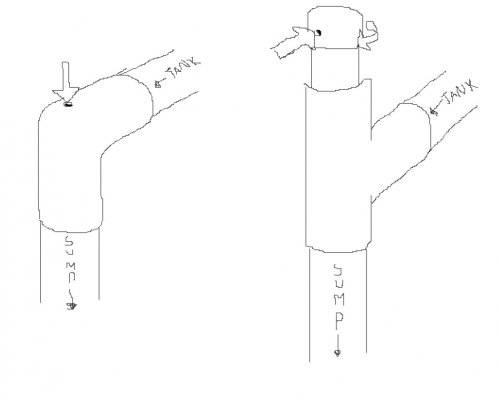
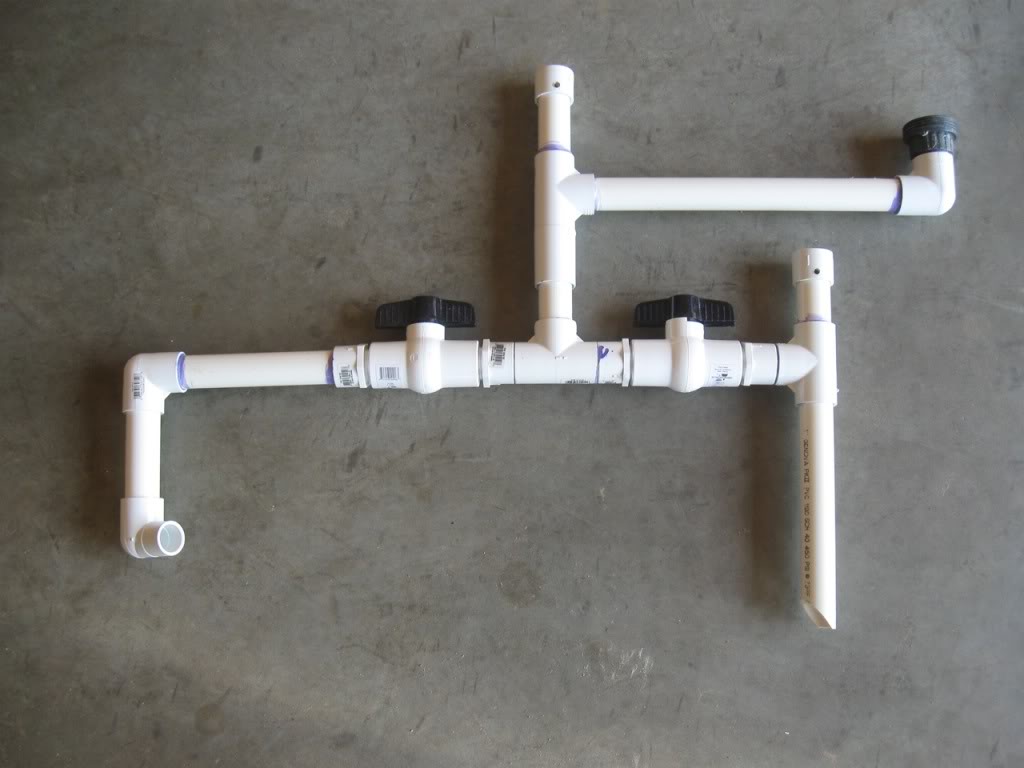
img_1144529_4_088e9c0eae69d3241206f7ee28d21292.jpg
 
Day 2

Water tests:
SG = about 1.025 +/- (using hydrometer)
Temp = 78
Ammonia = 0
PH = 8.4
Nitrate = 0
Nitrite = 0

Not what I expected from my water tests.... PH going up and Ammonia going down to zero along with nitrate and nitrite.

Not sure it means much on day two or not.
 
Back
Top Bottom